Removing acrylic nails safely requires patience and the right technique to prevent damage to the natural nail plate underneath. While salons offer professional removal services, many individuals seek effective at-home methods that minimize risk of thinning, tearing, or infection. Understanding the chemical properties of acrylic polymers and the proper use of solvents like acetone distinguishes safe removal from harmful shortcuts that compromise nail integrity.
Acrylic nails consist of ethyl methacrylate polymers that harden into a durable coating over natural nails. This chemical bond requires specific breaking mechanisms—either through solvent dissolution or mechanical filing—to separate the artificial material without stripping layers of the keratin underneath. The safest approaches replicate salon techniques using household materials, prioritizing gentle chemical softening over forceful physical removal.
The following guide examines multiple removal pathways, from the standard acetone soak to alternative flossing methods, with specific attention to timing, material requirements, and dermatological safety concerns. Each method carries distinct advantages and risk profiles depending on nail condition, acrylic thickness, and available tools.
How to Remove Acrylic Nails at Home
Four Removal Methods Compared
| Method | Duration | Required Tools | Risk Level |
|---|---|---|---|
| Acetone Soak | 20-40 minutes | 100% acetone, cotton, foil | Low |
| Dental Floss Lift | 15-30 minutes | Dental floss, cuticle stick | Low-Medium |
| Warm Water Soak | 40+ minutes | Bowl, warm water, soap | Medium |
| Professional Removal | 15 minutes | Salon-grade e-file, acetone | Lowest |
Salon professionals emphasize that replicating commercial soak-off techniques at home yields the safest results when users avoid rushing the process or forcefully prying nails loose.
Key Insights for Safe Removal
- Pure acetone dissolves acrylic polymer bonds without requiring aggressive physical filing that thins natural nails.
- Standard nail polish remover contains approximately 10% acetone and proves ineffective for breaking down hardened acrylic structure.
- Immediate moisturization post-removal counteracts acetone-induced dehydration of the nail bed and cuticles.
- Attempting removal on thin or brittle natural nails increases trauma risk; strengthening treatments should precede removal.
- Gel-acrylic hybrid applications often require professional intervention due to layered curing that home solvents cannot penetrate effectively.
- The dental floss technique works exclusively on sufficiently grown-out or loosened acrylics, not on fresh, thick applications.
- Glass files prevent snagging when smoothing residual material compared to coarse emery boards.
Essential Facts at a Glance
| Ideal Acetone | 100% pure concentration (not diluted remover) |
|---|---|
| Soak Time | 15-30 minutes per hand; check at 10-20 minutes |
| Water Temperature | Warm (when using bowl method) |
| Sensations During Removal | Mild tingling occurs; sharp pain indicates stopping immediately |
| Primary Damage Risk | Forcing or peeling acrylic before complete softening |
| Recovery Period | 1-2 weeks before reapplication of any nail product |
| Skin Protection | Petroleum jelly barrier prevents chemical drying |
| Post-Removal Care | Multiple daily applications of cuticle oil for 48 hours |
Does Acetone Remove Acrylic Nails Safely?
How Acetone Interacts with Acrylic Polymers
Acetone effectively breaks down the ethyl methacrylate polymers that constitute acrylic nail structure. Technical explanations from nail educators confirm that pure acetone penetrates the acrylic layer, causing it to soften and separate from the natural nail plate without mechanical abrasion. This chemical dissolution occurs within 10 to 30 minutes of consistent exposure, depending on acrylic thickness and whether the nail has pre-existing lifting.
The process requires saturation rather than brief contact. Cotton balls soaked in acetone must maintain direct pressure against the nail surface, secured with aluminum foil to prevent evaporation. Heat accelerates the reaction, which is why some technicians recommend placing hands in warm towels during soaking. However, acetone simultaneously extracts natural oils from surrounding skin and the nail bed itself, creating temporary brittleness that requires immediate remediation.
Protecting Natural Nails and Skin
Beauty industry guidelines stress that acetone itself does not damage healthy nail plates when used correctly; damage occurs through improper technique such as scraping before complete softening or using metal tools aggressively. The cuticle and surrounding skin require barrier protection before exposure. Petroleum jelly applied to the eponychium and lateral nail folds creates a hydrophobic seal that minimizes chemical drying and irritation.
Apply a thick layer of petroleum jelly, cuticle oil, or protective cream to the skin surrounding each nail before beginning the acetone soak. This barrier prevents the dehydration and whitening that commonly occurs with prolonged acetone exposure, maintaining skin integrity throughout the removal process.
How to Remove Acrylic Nails Without Damaging Natural Nails
Preparation and Surface Reduction
Preparation determines whether removal preserves nail thickness or causes permanent textural damage. Begin by trimming extensions to match the natural nail length using clippers or cuticle nippers, taking care not to clip the actual nail bed. Professional tutorials recommend filing the shiny topcoat, glitter, or colored designs with a coarse-grit file to thin the acrylic layer significantly. This reduction decreases soaking time and reduces the amount of filing needed later, but operators must stop immediately upon reaching the natural nail to avoid thinning the plate.
The Soaking and Removal Sequence
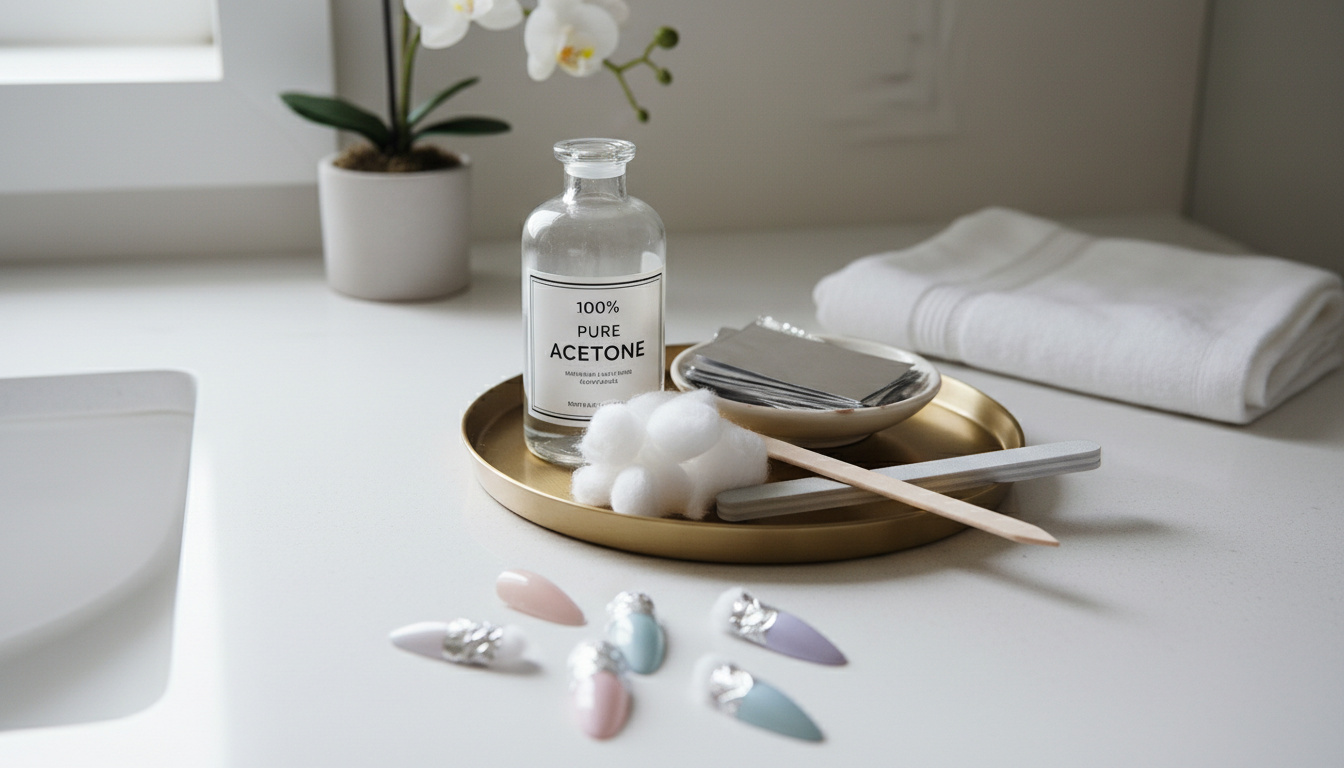
Saturate cotton balls or pads with 100% acetone—not standard nail polish remover—and place them directly over the filed acrylic surface. Wrap each fingertip tightly with aluminum foil strips or secure with soak-off clips to maintain full contact. The soak requires 10 to 30 minutes; checking at the 10-minute mark helps assess softening progress without over-exposure. Once the acrylic crumbles or lifts easily when pressed with a cuticle pusher, gently peel away the foil and wipe the dissolved material away. Stubborn sections require re-soaking for 5 to 10 additional minutes rather than forceful scraping.
Residual adhesive or thin acrylic layers remaining after the initial wipe should be addressed with a fine-grit buffer or glass file, followed by a warm soapy water rinse. The entire process demands patience; aggressive mechanical removal accounts for most reported cases of nail bed trauma and onycholysis.
Alternative Ways to Remove Acrylic Nails Without Acetone
The Dental Floss Technique
Alternative methods exist for individuals lacking acetone or experiencing skin sensitivities. The dental floss technique works specifically for acrylics that have grown out significantly or begun lifting naturally. Insert the floss beneath the lifted edge using a cuticle stick, then saw upward gently to pop the acrylic off the nail plate. This method provides mechanical separation without filing but requires sufficient gap space to avoid digging into the nail bed.
Never force or pry acrylics away from the nail plate before complete softening occurs. Aggressive lifting risks tearing the nail bed, causing bleeding, infection, and permanent thinning of the natural nail. If resistance occurs during removal, re-soak or abandon the attempt rather than applying pressure.
Warm Water Soaking Method
Soaking nails in warm soapy water for approximately 40 minutes softens acrylics sufficiently for gentle removal without chemical solvents. Documentation of this technique confirms it requires no filing or acetone, making it suitable for those with dermatitis or chemical sensitivities, though significantly slower than standard methods. After soaking, softened acrylic should lift with wooden sticks or gentle tweezing rather than metal tools.
Dental floss and warm water techniques prove ineffective on thick, freshly applied acrylics or gel-acrylic hybrids. These alternatives work best on nails with pre-existing lifting or for removing the final adhesive residue after acetone soaking. Attempting these methods on secure, thick applications increases damage risk substantially.
How Long Does the Removal Process Take?
- Preparation (5 minutes): Gather materials, trim acrylic extensions to natural nail length, and apply petroleum jelly to protect surrounding skin.
- Surface Filing (5-10 minutes): Buff away shiny topcoats and thin the acrylic layer without reaching the natural nail plate.
- Acetone Soaking (20-30 minutes): Wrap nails in acetone-soaked cotton and foil, waiting for polymer dissolution.
- Gentle Lifting (5-10 minutes): Remove foil wraps and ease softened acrylic away using cuticle pushers or wooden sticks.
- Residue Cleaning (5 minutes): Buff remaining material with fine-grit files and cleanse nails with warm soapy water.
- Immediate Aftercare (5 minutes): Apply cuticle oil and moisturizer to rehydrate dehydrated nail beds and surrounding skin.
Total time ranges from 45 minutes to one hour for a complete safe removal session, compared to 15 minutes in professional salon settings equipped with electric files and commercial acetone warmers.
What Do Experts Confirm About Safety?
| Established Safe Practices | Approaches Lacking Evidence or Consensus |
|---|---|
| Acetone soaking with 100% pure concentration | Peeling or prying acrylics before softening |
| Professional salon removal with e-files | Using 10% acetone nail polish remover exclusively |
| Petroleum jelly barriers to protect skin | Metal tool scraping of unsoftened acrylic |
| Re-soaking stubborn areas rather than forcing | Rapid filing into the natural nail plate |
| Waiting 1-2 weeks between acrylic applications | Immediate reapplication after removal |
Consensus among professional nail technicians and beauty industry guidelines identifies patience as the critical variable separating safe removal from traumatic nail damage. Expert sources emphasize that acetone soaking represents the safest at-home option when users resist the temptation to accelerate the process through physical force.
Why Does Removal Technique Affect Long-Term Nail Health?
Acrylic polymers create a semi-permanent bond with the natural nail surface through micromechanical adhesion and potential chemical interaction with nail keratin. Improper removal that strips this bond aggressively simultaneously removes superficial nail plate layers, resulting in thinned, weakened nails susceptible to splitting, peeling, and fungal infection. How to Identify a Wart becomes relevant knowledge when nail bed trauma creates entry points for human papillomavirus or fungal pathogens.
The nail plate grows approximately 3 millimeters monthly, meaning damage sustained during removal remains visible for three to six months as the nail matures. Chemical dissolution via acetone avoids mechanical abrasion, preserving the integrity of the nail bed and preventing the textural ridges that characterize over-filed nails. Understanding these biological timelines underscores why gentle removal protocols outweigh quick-fix approaches that promise speed at the expense of structural health.
What Do Professional Sources Recommend?
Acetone soak as second-best to salon removal, citing lower damage risk with slow, gentle work.
Beauty Industry Consensus, L’Oréal Paris Beauty Magazine
Moisturize immediately; apply cuticle oil or petroleum jelly, massage into nail bed and cuticles. Buffer softly for smoothness.
Aftercare Protocols, Licensed Nail Technician Demonstrations
No direct dermatologist quotations appeared in available research materials, though consensus documents from nail education organizations align with dermatological warnings regarding over-filing and forceful removal. Professionals universally recommend discontinuing home removal attempts and consulting certified nail technicians if bleeding, sharp pain, or significant nail bed separation occurs during the process.
What Are the Essential Steps for Nail Recovery?
Successful acrylic removal concludes with a recovery phase that prioritizes rehydration and structural rest. Expert guidance suggests applying cuticle oil or petroleum jelly immediately upon completing removal, followed by repeated applications every few hours for the first 48 hours to counteract acetone-induced dehydration. Users should avoid nail polish, gel, or new acrylic applications for one to two weeks, allowing the nail plate to regain thickness and resilience. Maintaining overall health through proper hydration supports nail regeneration; Is Lemon Water Good for You explores hydration strategies that may indirectly benefit keratin synthesis and nail strength during the recovery period.
Frequently Asked Questions
Does removing acrylic nails hurt?
Proper removal causes minimal discomfort—perhaps mild tingling from acetone exposure. Sharp pain indicates improper technique, such as prying unsoftened acrylic or filing into the nail bed. Stop immediately if pain occurs.
Is it safe to remove acrylic nails at home?
Home removal proves safe when following acetone-soak protocols and avoiding force. However, salon removal remains safer due to professional-grade tools and expertise, particularly for thick sets or damaged natural nails.
Can you remove acrylic nails with nail polish remover?
Standard nail polish remover contains only 10% acetone and proves ineffective. Pure 100% acetone is required to dissolve acrylic polymers sufficiently for safe removal.
What is the best way to remove acrylic nails?
The acetone soak method ranks as the safest at-home option: trim, file top layers, soak in pure acetone for 20-30 minutes, then gently lift softened material. Professional salon removal remains the gold standard.
When should I see a professional for acrylic removal?
Seek professional help if nails are thin, painful, infected, or if acrylics are extremely thick or adhered with gel products. Also consult professionals if home removal attempts cause bleeding or significant nail bed exposure.

Arthur Oliver Howard Fletcher is a staff writer for NationalReport.uk, covering UK national news, politics, the economy and public services. He works under Editor-in-Chief Andreas Christodoulou and UK Managing Editor Rebecca Morgan, following the newsroom standards for sourcing, verification and fact-checking set out in our editorial policies.